> For the complete documentation index, see [llms.txt](https://library.zoom.com/llms.txt). Markdown versions of documentation pages are available by appending `.md` to page URLs; this page is available as [Markdown](https://library.zoom.com/technical-library/ja/kn/third-party-integrations/zoom-for-outlook-add-in-explainer/zoom-for-outlook-add-in-settings.md).
# Outlook向けZoom アドインの設定
Outlook向けZoomアドインを使用すると、Outlookカレンダーイベントに追加するZoom Meetingsの複数の設定を操作できます。以下のセクションでは、アドインの設定内にある主な機能について説明し、それらにアクセスして設定する方法を案内します。
## 設定タブの確認
#### **Zoomミーティングコントロールおよびトラブルシューティングツールには、Outlook向けZoomアドインの設定タブからアクセスできます**.
アドインの設定タブでは、オーディオとビデオの設定を設定する、詳細な Zoom Meetings コントロールを調整する、エラーメッセージにアクセスする、アクティビティログを確認する、ミーティング テンプレートを利用する、アドイン内でサインイン状態を確認することができます。
Outlook デスクトップ クライアントでは、設定タブは Outlook向けZoom をクリックすることで見つけることができます **追加機能アイコン** Outlook のカレンダー イベント上部のコントロールにあるものをクリックし、その後、選択します **設定**.
#### **設定タブでサインイン状態を確認し、Outlook向けZoomアドインにログインしていることを確認します**.
次の画面で **設定** タブでは、アドインにログインしているユーザーの名前がウィンドウ下部に表示されます。
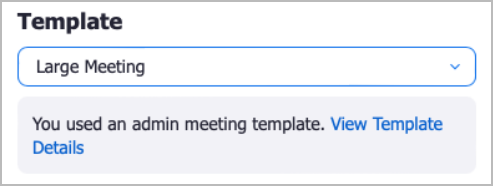
#### **アドインの設定タブで事前作成済みのミーティングテンプレートにアクセスし、スケジュール作成プロセスを効率化します**.
次のことができます [Zoomウェブポータルでミーティングテンプレートを作成する](https://support.zoom.com/hc/en/article?id=zm_kb\&sysparm_article=KB0067229)。これらのテンプレートには、ミーティングのスケジュール作成時に特定のニーズに合わせた事前定義済みの設定が保存されます。これらの設定には、「ホストより前に参加」を有効にする、自動レコーディング、言語通訳、定期スケジュールの設定などのオプションが含まれます。
ミーティングテンプレートには、アドインで次の場所に移動してアクセスできます **設定タブ** 次の項目から目的のテンプレートを選択します **テンプレート** ドロップダウンメニュー。
#### **アドインをトラブルシューティングするために、設定セクションでエラーメッセージを表示し、アクティビティログを有効にします**.
Outlook向けZoomアドインを自身で、またはZoomサポートとともにトラブルシューティングする場合、エラーメッセージとアクティビティログはソリューションを見つけるための重要なツールです。
**エラーメッセージ**
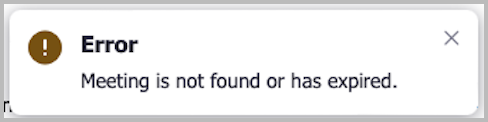
エラーメッセージはアドインウィンドウの下部に表示され、ミーティングのスケジュール作成やアドイン機能に関する問題を示します。
**アクティビティログ**
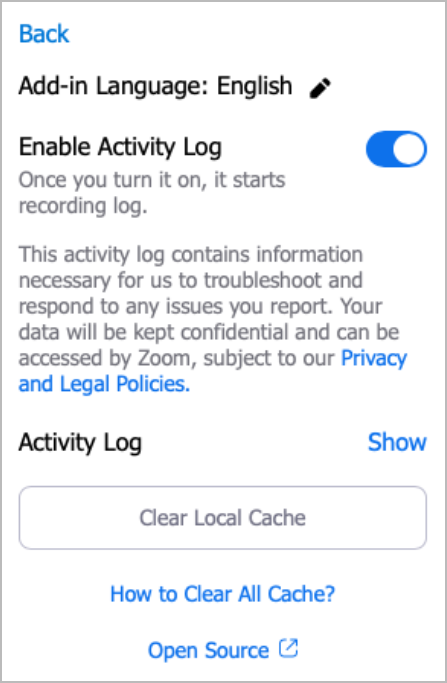
アクティビティログの設定には、アドインの設定タブをクリックしてから、設定セクション下部の歯車アイコンをクリックしてアクセスできます。
アドインで問題が発生し、Zoomサポートからの支援が必要な場合、トラブルシューティングのためにアクティビティログの提供を求められることがあります。アクティビティログを有効にするには、スイッチを切り替えて有効化するだけです。その後、エラーの原因となっているタスクを実行します。完了したらアクティビティログを無効にし、ログファイルをZoomサポート担当者と共有してください。サポートチームがログを分析して、潜在的な問題を特定します。
#### **高度なZoomミーティング設定は、アドインの設定タブで利用できます**.
高度な設定にアクセスするには、まず次の場所に移動します **設定** タブ。次に、設定ページ内で次の項目を見つけます **詳細オプション** セクションで、次の項目をクリックします **表示** ボタン。この操作により、Zoomミーティングの次の高度な設定が表示されます。
| Outlook向けZoomアドインの高度な設定 |
| ------------------------------------------------------------------------------------------------------------------------------------------------------------------------------------------------------------------------------------------------------------------------------------------------------------------ |
| - 開始時刻前の参加者の参加を許可する
- 参加時に参加者をミュートする
ミーティングを自動的にレコーディングする
- ミーティングの質問を自動的に開始する
- 既存のテキストの上にZoomミーティングの招待状を挿入する
- 特定の国・地域のユーザーの入室を承認またはブロックする
- 位置情報フィールドに招待リンクを含める
- ミーティング招待状の言語を選択する
- 代替ホスト
|
## アドイン向けネストされたアプリ認証の設定
Officeアドイン向けのネストされたアプリ認証(NAA)は、従来のExchangeトークンをMicrosoft Entra IDポリシーに置き換えるものであり、次によって要求されます [Microsoftのセキュリティ標準](https://devblogs.microsoft.com/microsoft365dev/new-nested-app-authentication-for-office-add-ins-legacy-exchange-tokens-off-by-default-in-october-2024/)。これにより、Exchangeデータアクセスプロトコルへのコンプライアンスが確保され、安全な認証ワークフローがサポートされます。アカウント所有者と管理者は、Azureポータルを介してNAAを設定し、Zoomウェブポータル内で直接管理できます。
サポート記事を参照してください [Officeアドイン向けネストされたアプリ認証の設定](https://support.zoom.com/hc/en/article?id=zm_kb\&sysparm_article=KB0078410) アドイン向けのNAAの設定に関する詳細について。
{% hint style="info" %}
ネストされたアプリ認証(NAA)は、Exchange Onlineでのみサポートされています。Exchange 2019(またはその他のオンプレミス版Exchange)を使用する組織は、従来のExchangeユーザーIDトークンおよびコールバックトークンを引き続き使用する必要があります。これらはオンプレミス環境ではブロックされないためです。
{% endhint %}
---
# Agent Instructions
This documentation is published with GitBook. GitBook is the documentation platform designed so that both humans and AI agents can read, navigate, and reason over technical content effectively. Learn more at gitbook.com.
## Querying This Documentation
If you need additional information that is not directly available in this page, you can query the documentation dynamically by asking a question.
Perform an HTTP GET request on the current page URL with the `ask` query parameter, and the optional `goal` query parameter:
```
GET https://library.zoom.com/technical-library/ja/kn/third-party-integrations/zoom-for-outlook-add-in-explainer/zoom-for-outlook-add-in-settings.md?ask=&goal=
```
`ask` is the immediate question: it should be specific, self-contained, and written in natural language.
`goal` is optional and describes the broader end goal you are ultimately trying to accomplish on behalf of the user. GitBook uses it to tailor the answer towards what is most useful for that goal.
The response will contain a direct answer to the question and relevant excerpts and sources from the documentation.
Use this mechanism when the answer is not explicitly present in the current page, you need clarification or additional context, or you want to retrieve related documentation sections.